He had managed to get it off of its wheel and repair it, but it didn’t want to go back on. An extra set of hands, plus some outsmarting of the little fellow, and we had the little tire back on its rim. I was a hero.
A small tire can shut down an operation just as easy as a big tire. They need attention, proper inflation and repair when needed – just like a big tire. They can be a pain in the posterior to get on and off the rim.
Tools are made to change small tires. They bolt to the floor or to a sturdy workbench, and shops that deal with small tires all the time will have one of these. Most of us don’t have to repair small tires often enough to have the luxury of the proper tools.
If the wheel and tire use an inner tube and the wheel is a two-piece construction, then things are easy. If the wheel is one piece, then it takes some muscle and treachery to get the tire off and back on the wheel.
The first step is to get the wheel and tire off of the cart, wagon, lawn mower or whatever it’s on. The second step is to secure it. Almost. First, break the bead of the tire loose from the wheel.
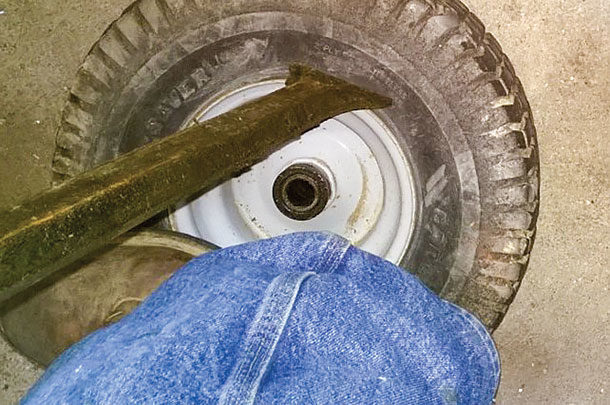
To do this, place the wheel on the floor and stand on it. Then, using a big crowbar with a blunt, rounded end, hit the tire next to the wheel until the bead breaks loose and drops away from the wheel.
Then turn it over and loosen the other bead. A bead-breaking hammer used for larger tires will work, if you have one. Don’t hit your toe – and try not to hit the wheel.
Next, find or make a hole in a sturdy workbench or table. Push a carriage bolt or length of ready-rod up through the hole and run a nut down on it to hold it in upright.

Place the wheel and tire to be repaired over this bolt with the bolt through the hub of the wheel. Place a washer large enough to hold the hub down over the bolt, and run another nut down tight enough to hold tire and wheel in place.
Get or make a soap solution to lube the bead area of the tire so it will come off of the wheel. About a teaspoon of ordinary dish soap in a cup of water should do the trick. Liberally coat the bead area of the first side of the tire.
If you have actual tire spoons, use them. If not, small to medium-size pry bars (see the pictures) will do.

The tips need to be smooth and not sharp, especially if you are working on a tire with an inner tube inside it. Only use screwdrivers as a last resort; they are too narrow and usually too sharp and will damage the tire.
Remove the valve stem, especially on a tire with a tube inside. Your tire irons of whatever type will make more holes in the inner tube if you do not make sure, each and every time you pry on the tire, that the tube is not between the tire iron and the rim.
Note that the diameter of the wheel in the hub area is smaller than at the rim area. This is called a drop-center wheel. While you pry one side of the tire off of the wheel, the other side must be down in the drop-center.
 Unless this happens, there is no way on this green earth you are going to get the tire off of that wheel.
Place the business end of two tire irons between the bead and the rim. While pushing the off-side bead into the drop center, lever one of the irons to force the edge of the bead across the rim of the wheel.
Hold it down, and do the same with the second. Now, either remove one iron and get another bite on the bead, or use a third iron to do so. Repeat until the bead is off of the wheel.
You may be able to make the repair without removing the second bead from the wheel. If you must, use the same sequence as with the first bead, applying liberal lubricant first.
When putting the tire and wheel back together, again use liberal lubricant. The first bead will usually go on without incident. The second will probably want to walk around the rim.

Once you have the bead in place to start levering it home, place a pair of locking (vise-grip) pliers on the edge of the rim. This will hold the tire from walking around the rim as you pry the bead back over it. This is the trick I showed the young man earlier.
If your repair is to install an inner tube inside a tubeless tire that is sound other than it will not hold air, get one bead of the tire on the wheel and then install the tube. The less air in the tube, the easier it will be to push it out of the way so you don’t make holes in it by getting it caught between the rim and your tire irons.

If you are installing a new or repaired tubeless tire, there may be an issue getting the beads of the new or repaired tire close enough to the rim of the wheel so air will seal that area and allow the tire to inflate.

Add a spacer to the hold-down bolt so it holds the wheel above the surface of the workbench, allowing gravity to hold the lower bead next to that rim. Sometimes placing a cargo strap circumferentially around the tread of the tire will force the beads close enough to the rim to seal it. If not, Murphy’s soap is in order.
 Murphy’s soap is a water- and soap-based goo thicker than grease-gun grease. If you have trouble finding Murphy’s soap, talk your local tire store out of a big handful of it.
Murphy’s soap is slathered around the wheel, filling the gap between tire bead and wheel rim. It will hold enough air (if you use enough of it) to allow the air pressure from the inflation hose to move the tire outward, making a firm seal as the bead contacts the wheel rim.

Once the bead pops into place, gather up the Murphy’s soap and return it to its container. Sometimes, grease-gun grease can be used in lieu of Murphy’s soap, but it’s not a good idea. If you “almost” have enough Murphy’s soap, fill the gap with it and support it with whatever you have to hold it in place. (In the pictures, I used a couple of ordinary plastic bags for this purpose.)
Way back when, we used starting fluid and a lighted match to seat big truck tires, but I’m not allowed to tell you how that’s done here. ![]()
PHOTO 1: In position to break the bead.
PHOTO 2: This is the hold-down bolt on a workbench.
PHOTO 3: Bottom view of the hold-down bolt on the workbench.
PHOTO 4: The vise-grip keeps the tire from walking around the rim instead of crossing it.
PHOTO 5: When you are close to finished, get two tire irons in place because ...
PHOTO 6: You’ll never get the last one between the tire and rim.
PHOTO 7: This shows Murphy’s soap in place.
PHOTO 8: You may have to help hold it in place if you “almost” have enough Murphy’s soap.
PHOTO 9: Air is now holding the tire against the rim. Remove whatever you used to help the Murphy’s soap.
PHOTO 10: Use a water pump plier to install the snap ring that holds the wheel to its axle.
PHOTO 11: Success: The tire bead is separated from the rim without smashing a toe. Photos by Brad Nelson.

-
Brad Nelson
- Freelance Writer
- Royal City, Washington


